> ## Documentation Index
> Fetch the complete documentation index at: https://docs.binarly.io/llms.txt
> Use this file to discover all available pages before exploring further.
# First Scan
Running your first scan with the Binary Transparency Platform is simple and fast. You can upload a variety of binary file types directly into the platform for analysis—most scans complete within a few minutes.
Uploads are organized into products, which work like folders or containers for related image versions. Think of a product as a collection of scans for a particular firmware or binary over time. You’ll find more on that in the Products section.
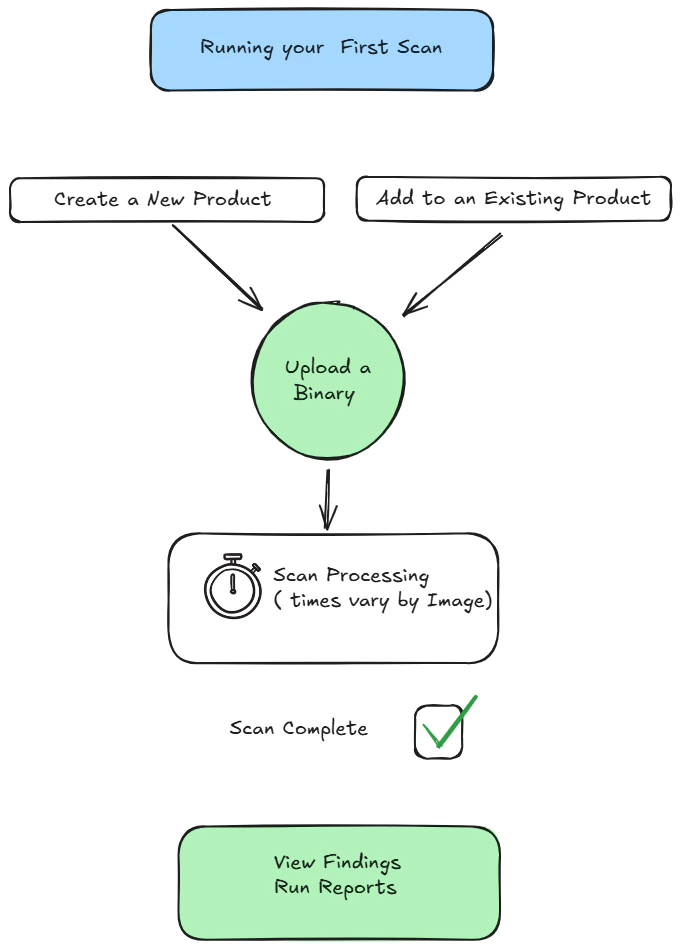
The diagram below shows the basic flow and the simple steps to run your first scan.
 ### Here’s a quick walkthrough to get started:
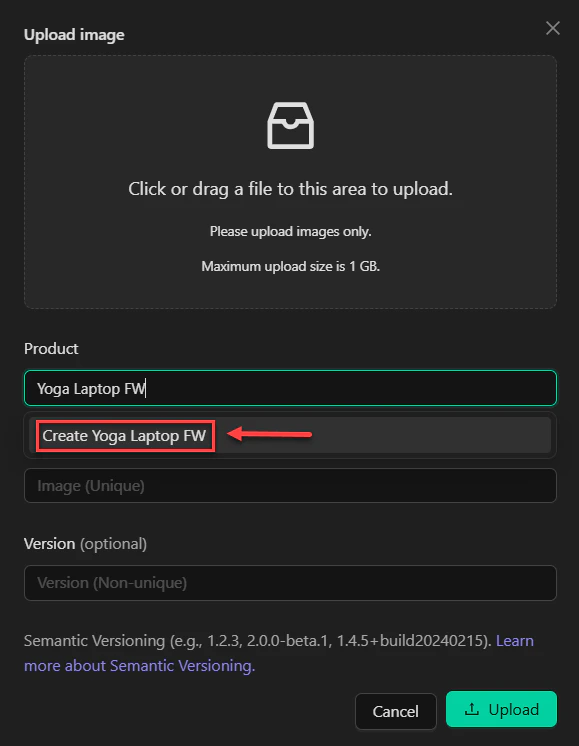 1. **Find the Upload Button**\
From the dashboard, look in the bottom-left corner for the green upload arrow. Clicking it opens the upload dialog.
2. **Create a Product**\
Give your product a clear, descriptive name. Then click **Create** to make the container for your image.
3. **Add Your Binary**\
Drag and drop your binary file into the dialog—or browse to it manually. You’ll also have the option to label this as a new version, which helps track changes over time.
4. **Upload**\
Once your file is selected and versioned (optional), click **Upload**.
Upload speed depends on file size. Don’t close your browser during the upload process.
### **What Happens Next**
After uploading, the scan will enter a **processing** or **in progress** state. For small files, this usually takes 2–3 minutes. Larger files—like containers, embedded OS images, or full kernel binaries—might take 30 minutes or more.
You can track progress from the **Scans** menu.
### **Viewing the Results**
When processing is done, your scan will show as **finished**. Here's how to view the findings:
1. In the **Products** grid, click the product you just created.
2. Select the completed image scan.
3. You’ll land on the **Image Dashboard**, where you’ll see high-level findings from the binary analysis.
1. **Find the Upload Button**\
From the dashboard, look in the bottom-left corner for the green upload arrow. Clicking it opens the upload dialog.
2. **Create a Product**\
Give your product a clear, descriptive name. Then click **Create** to make the container for your image.
3. **Add Your Binary**\
Drag and drop your binary file into the dialog—or browse to it manually. You’ll also have the option to label this as a new version, which helps track changes over time.
4. **Upload**\
Once your file is selected and versioned (optional), click **Upload**.
Upload speed depends on file size. Don’t close your browser during the upload process.
### **What Happens Next**
After uploading, the scan will enter a **processing** or **in progress** state. For small files, this usually takes 2–3 minutes. Larger files—like containers, embedded OS images, or full kernel binaries—might take 30 minutes or more.
You can track progress from the **Scans** menu.
### **Viewing the Results**
When processing is done, your scan will show as **finished**. Here's how to view the findings:
1. In the **Products** grid, click the product you just created.
2. Select the completed image scan.
3. You’ll land on the **Image Dashboard**, where you’ll see high-level findings from the binary analysis.
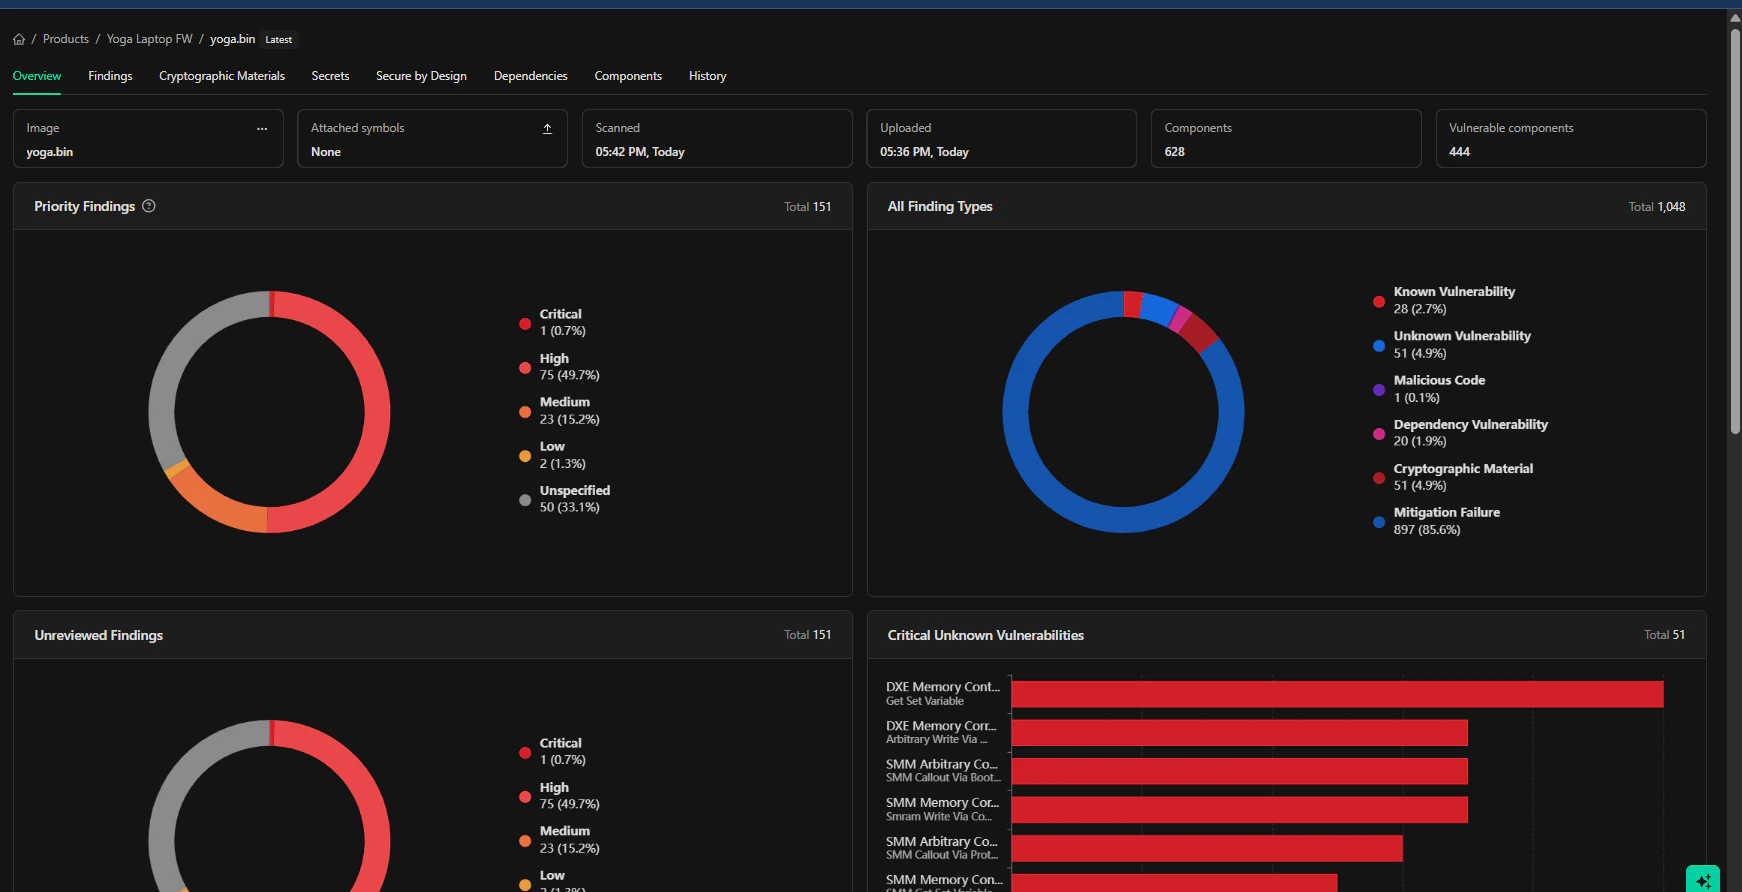 \
From there, you can:
* Navigate through sections of the report
* Use interactive graphs to drill down
* Filter, sort, and export data
* Share or take action on specific results
If you're ready to go deeper, check out the **Diving into Findings** section for a breakdown of everything in the scan results.
\
From there, you can:
* Navigate through sections of the report
* Use interactive graphs to drill down
* Filter, sort, and export data
* Share or take action on specific results
If you're ready to go deeper, check out the **Diving into Findings** section for a breakdown of everything in the scan results.