SaaS Customers
When contacting support, please provide:- Your organization name
- Intended use case (CI/CD, automation, integration)
- Any specific permission requirements
- Client ID - Your API client identifier
- Client Secret - Your secure API key
- Auth URL - Your authentication endpoint
On-Premises Customers
On-Premises customers have full access to Keycloak and can create API clients directly.Step 1: Navigate to Keycloak
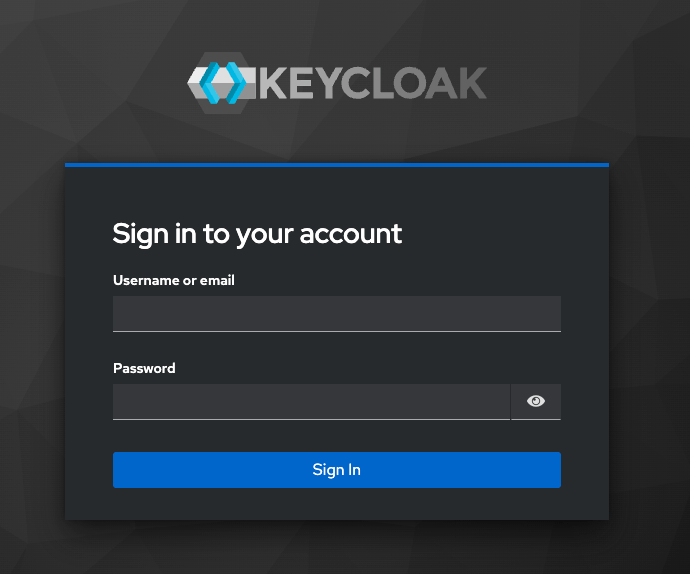
- Open your Keycloak Admin Console:
https://<YOUR_KEYCLOAK_HOST>/admin - Log in with your administrator credentials.
Step 2: Select Realm
- Near the top-left corner, click Manage realms
- Select
BinarlyRealmfrom the list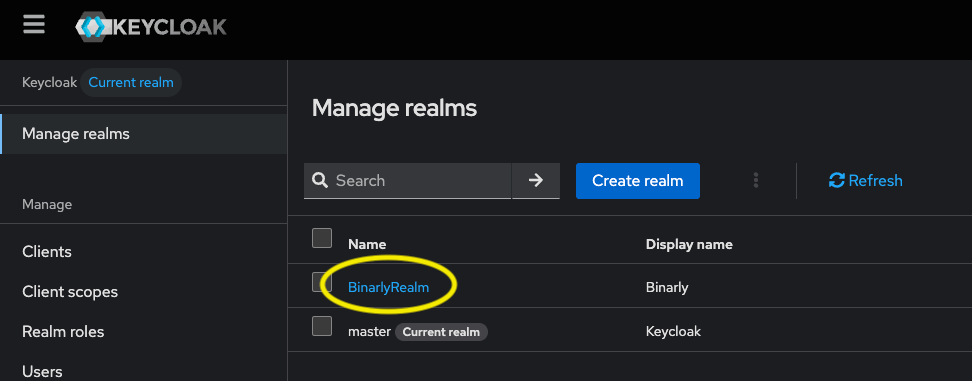
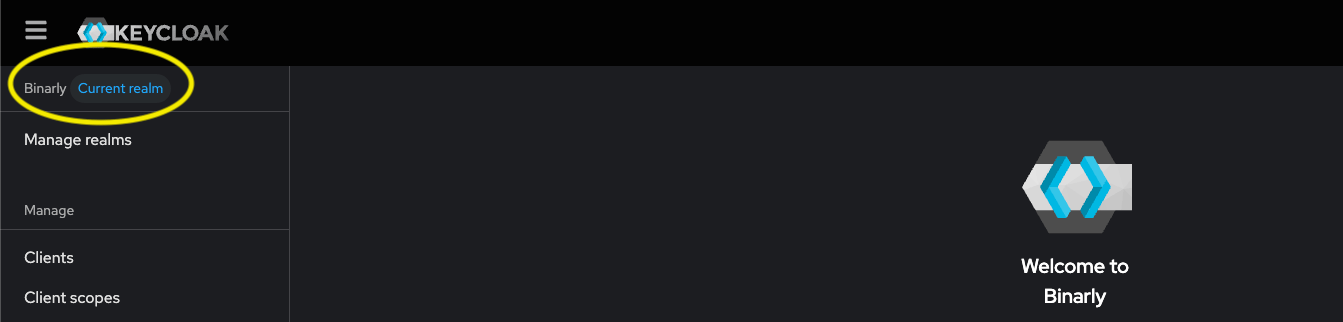
- Verify you are in the correct realm
Step 3: Create a Client
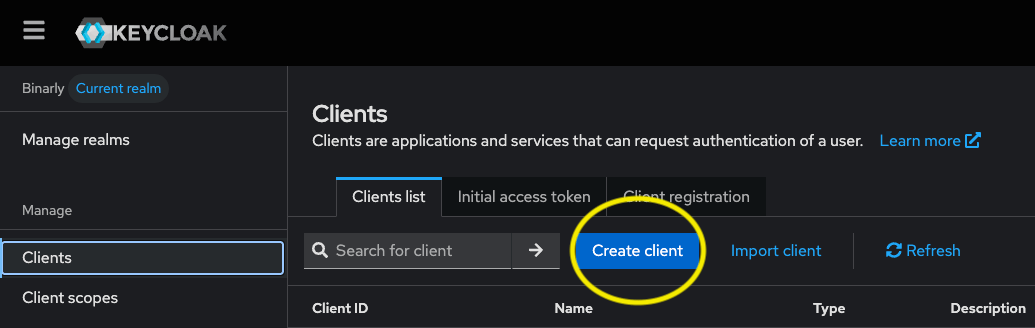
- Select Clients from the left-hand menu.
- Click Create client.
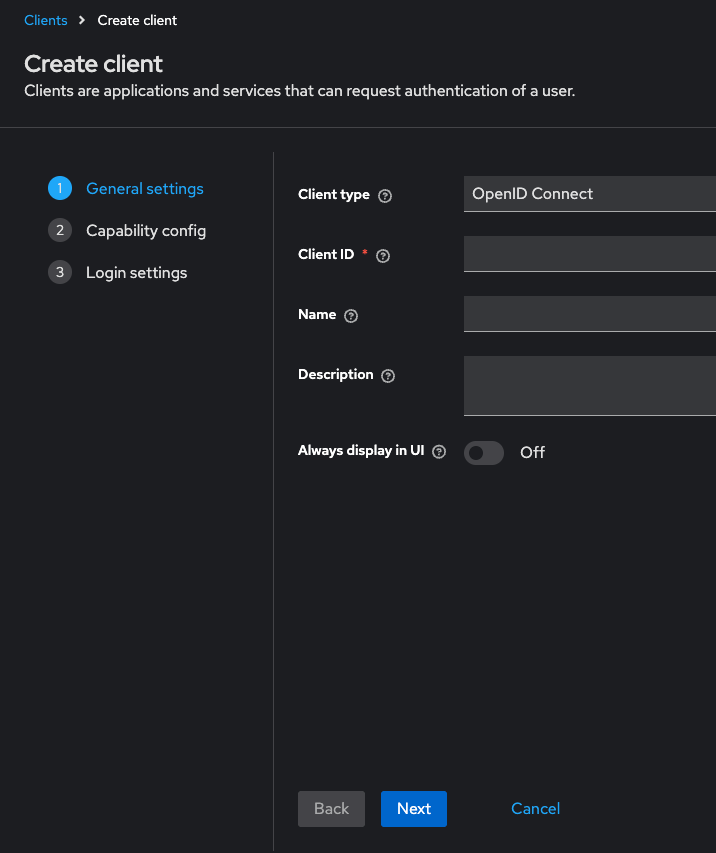
General Settings
- Client type: OpenID Connect
- Client ID: Enter a descriptive ID (e.g.,
api-clientorci-cd-automation). - Name: (Optional) Enter a friendly name.
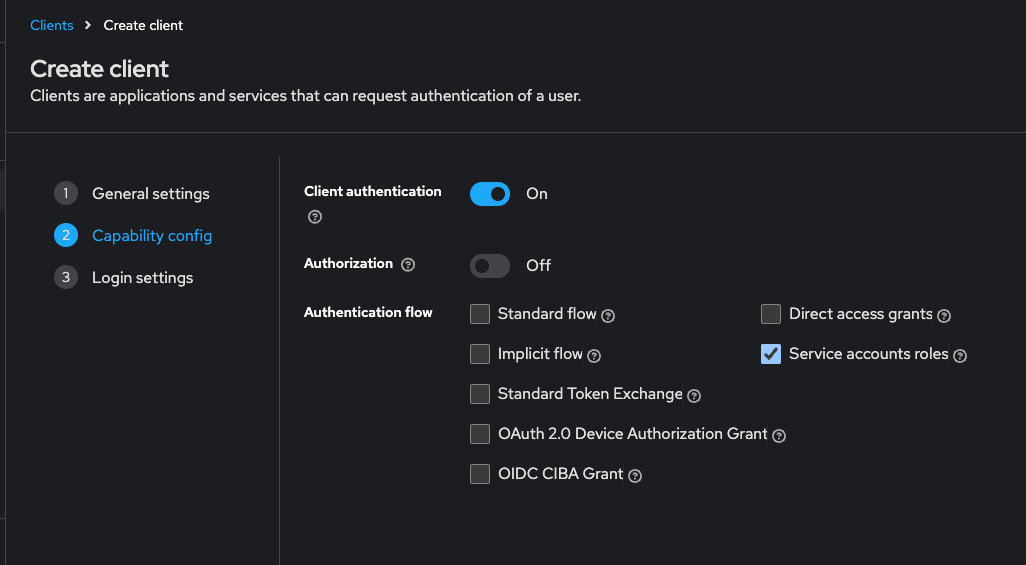
Capability Config
- Client authentication: On (This enables Client Credentials).
- Authorization: Off (unless specifically required).
- Authentication flow:
- Set Service accounts roles only
Step 4: Obtain Credentials
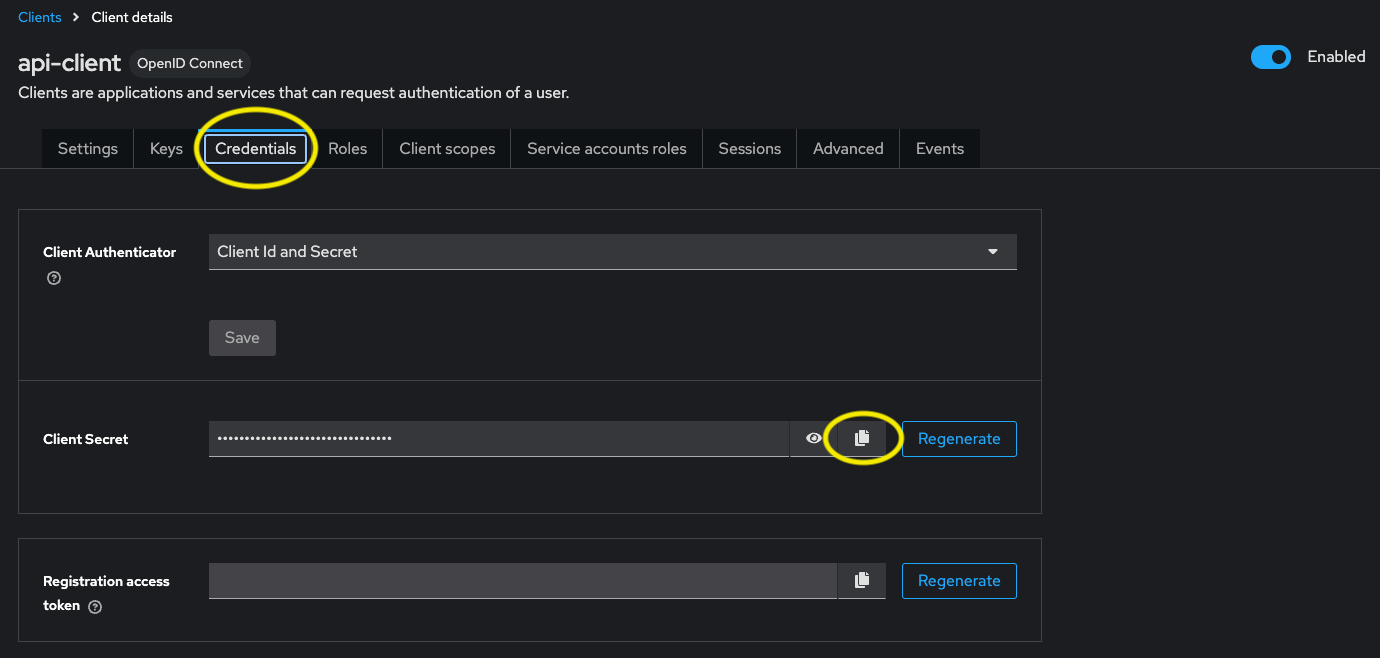
- After saving, select the Credentials tab at the top of the client details page.
- Copy the Client Secret. This is your secure key for API access.